Maintaining clean faucet heads in your kitchen and bathroom is essential for optimal water pressure and hygiene. Over time, mineral deposits from water can accumulate on faucet heads, causing reduced water flow and uneven spray patterns. This buildup not only affects the performance of your fixtures but can also harbor bacteria if left untreated. Learning how to clean a faucet head properly will help extend the life of your faucets and ensure you have consistent water pressure throughout your home.
Why You Should Clean Your Faucet Head
Regular cleaning of your kitchen faucet head and bathroom faucets serves multiple important purposes:
- Prevents Mineral Buildup: Hard water contains minerals that leave deposits on your faucet over time. These water deposits can clog the small holes in your faucet aerator.
- Maintains Water Pressure: A dirty faucet head with buildup will cause a decrease in water flow, making simple tasks like washing dishes more time-consuming.
- Improves Water Quality: Buildup of dirt and mineral residue can affect the taste and appearance of your water.
- Eliminates Bacteria: Moisture and residue create a breeding ground for harmful bacteria that could contaminate your clean water.
- Extends Faucet Life: Regular maintenance helps your faucets last longer, saving you the cost of replacement.
Signs Your Faucet Head Needs Cleaning
Watch for these indicators that it’s time to clean your sink faucet heads:
- Reduced water pressure when turning on the tap
- Uneven spray patterns or partial spray from your kitchen faucet sprayer
- Visible white or green water residue on the faucet head
- Water spots appearing more frequently around your sink
- Strange odors or discoloration in your tap water
What You’ll Need
Tools
- Adjustable wrench (or a special tool like a faucet aerator removal key for complex faucet types)
- Soft-bristled brush or toothbrush
- Non-scratch scrub sponge
Materials
- White vinegar (apple cider vinegar works too)
- Baking soda
- Dish soap
- Cup of tap water
- Clean towel
Step-by-Step: How to Clean a Faucet Head
Step 1: Turn Off the Water Supply (If Needed)
For most basic cleaning, you won’t need to shut off the water. However, if you plan to remove the entire spray head, especially from a pulldown kitchen faucet head, it’s safer to turn off the water supply first.
Step 2: Remove the Faucet Head or Aerator
- For sink faucets with a removable aerator, unscrew it by hand or use an adjustable wrench if it’s tight.
- For kitchen faucet sprayers or pulldown models, check the manufacturer’s instructions as the method may vary by model.
- If you have high-end faucets or bronze faucets, be especially careful not to scratch the surface during removal.
Step 3: Soak in Vinegar or Cleaning Solution
- Fill a small bowl with white vinegar (enough to fully submerge the faucet head).
- Place the faucet head or aerator in vinegar for 30 minutes to an hour.
- For heavy buildup, you may need to extend the exposure to vinegar for up to 8 hours.
Step 4: Scrub Off Mineral Deposits
- After soaking, use a soft-bristled brush to scrub away loosened mineral buildup.
- For pesky buildup that remains, a soft-bristle scrub brush works well to remove calcium buildup and lime buildup.
- Be gentle on porous surfaces or metal surfaces to avoid scratching.
Step 5: Rinse and Reattach the Faucet Head
- Rinse the faucet head with cold water to remove all vinegar and loosened deposits.
- Dry the faucet head thoroughly.
- Reattach the clean faucet head to the faucet fixture.
- Turn on the water to test proper water flow and consistent spray pattern.
Alternative Cleaning Methods
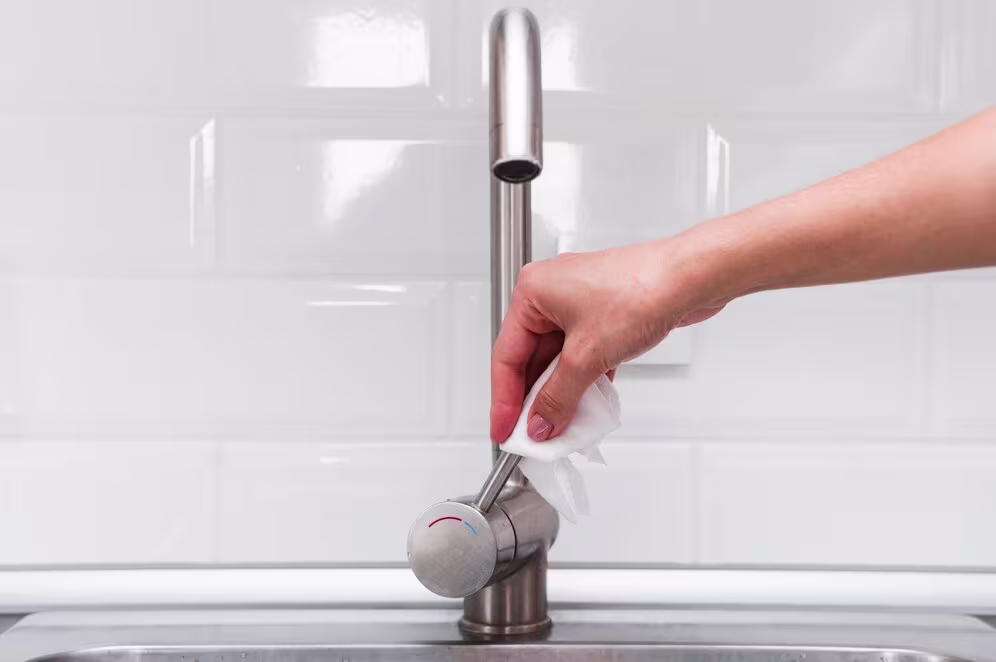
Clean with Soap and Warm Water
For regular maintenance or light cleaning:
- Mix mild dish soap with hot water in a small bowl.
- Use a non-scratch sponge to wipe down the faucet housing and spray head.
- This method works well for modern faucets that are cleaned frequently.
Use Baking Soda Paste for Tough Stains
For stubborn residue and extra cleaning power:
- Create a paste using baking soda and a small amount of water.
- Apply to areas with heavy buildup.
- Let sit for 15 minutes before scrubbing with a brush.
- This natural solution is great for functional faucets with visible residue.
Try Steam Cleaning for Gentle Removal
For elegant farmhouse kitchen faucets or high-quality kitchen faucets:
- Hold a steaming cloth against the faucet head for a few minutes.
- The heat will help loosen mineral deposits.
- Wipe clean with a soft cloth.
Use CLR for Heavy Buildup
For extreme cases:
- Commercial cleaners designed for calcium, lime, and rust can be effective.
- Always follow product directions and rinse thoroughly afterward.
- This approach is suitable when natural solutions aren’t providing real solutions.
How to Clean a Faucet Aerator
The faucet aerator is a small but crucial component that affects water flow:
Remove and Disassemble the Aerator
- Unscrew the aerator from the end of your faucet.
- Some models may require a faucet aerator removal key.
- Place the parts in order as you disassemble to ensure proper reassembly.
Soak in Vinegar for 30 Minutes
- Submerge all aerator components in white vinegar.
- The acidity of vinegar helps dissolve water deposits.
Scrub with a Toothbrush
- After soaking, use a small brush to clean each component.
- Pay special attention to the grid surface where most buildup occurs.
Rinse and Reassemble
- Rinse all parts with clean water.
- Reassemble the aerator and screw it back onto the faucet.
- Test water flow to ensure efficient water delivery.
Maintenance Tips to Prevent Buildup
Regular cleaning prevents the return of faucet residue:
- Monthly Cleaning: Wipe down faucet heads weekly with a vinegar solution to prevent accumulation.
- Dry After Use: Keep a small towel nearby to dry the faucet head after heavy use, especially in areas with hard water.
- Consider Filtration: Water filters can reduce mineral content before it reaches your faucets.
- Quick Vinegar Spray: A weekly spray with a mix of vinegar and water can help prevent buildup over time.
When to Call a Professional
While most faucet cleaning tasks are DIY-friendly, sometimes expert advice is needed:
- If you notice persistent water pressure issues after cleaning
- If you have hands-free kitchen faucet or innovative hands-free models that require specialized knowledge
- If your faucet handles or other components are leaking after cleaning
- If you suspect the mineral buildup is deeper within your plumbing system
- If you have a high-end faucet or akitchen faucet with proprietary manufacturing tool requirements
Conclusion
Keeping your faucet heads clean doesn’t require expensive cleaning products or a high cost. Regular maintenance with simple household items like vinegar, baking soda, and dish soap can keep your faucets functioning properly and looking great. By following these cleaning methods, you’ll maintain optimal water pressure, prevent bacteria growth, and extend the life of your perfect faucet.
Whether you have cheap kitchen faucets or high-end models, the same basic principles apply. Remember that different faucet types may require slightly different approaches, but the goal remains the same: removing buildup to restore proper function and appearance. With these tips, your faucets will continue to provide efficient water service throughout your home.
Prime Narratives offers expert home improvement tips, practical DIY solutions, and insightful guides to help you create a more functional, beautiful, and comfortable living space—every step of the way.


